
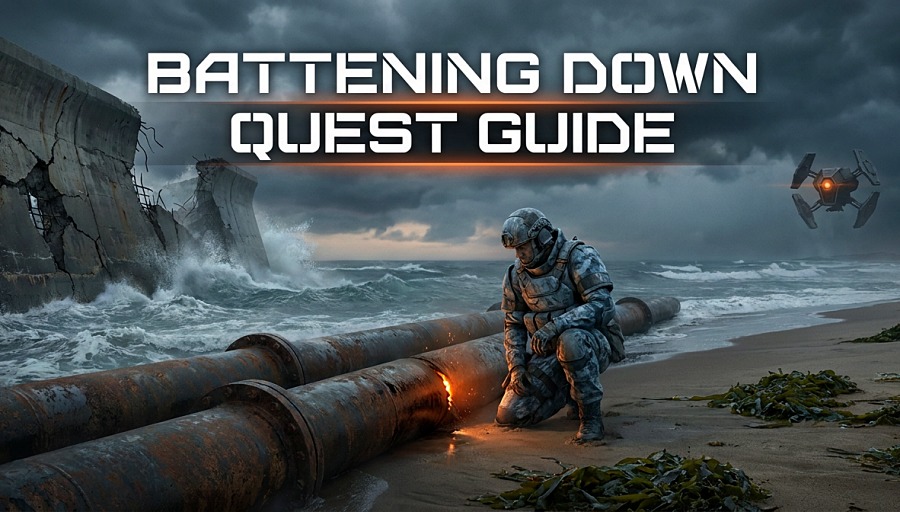
The Arc Raiders Battening Down quest is a side mission given by trader Apollo in the September 2026 Riven Tides update that sends you across the new coastal map to complete three field tasks: photograph cracks in the Wavebreaker seawall, sample seaweed at Azzurro Beach, and weld a leaking oil pipe in the far northeast. Once all three objectives are done and you return to Apollo at Speranza, you’ll earn a Riven Tides Hotel Keycard No. 107 and Smoke Grenade Traps as rewards. The quest can be done in any order, no inventory items are required, and a free loadout is enough since the entire run takes place along the quieter northern shoreline.
I just finished the Battening Down quest myself, and I want to save you the same headache I had with that infamously hidden oil pipe. In this guide, I’ll walk you through every objective with exact spawn-based routing, the rewards you can claim, what room 107 actually contains, and the pro tips no other guide is telling you. Let’s batten down and get this one knocked out.
Table of Contents
Battening Down Quest at a Glance
Here’s the cheat-sheet table you’ll want to bookmark before you drop into Riven Tides:
| Detail | Information |
|---|---|
| Quest Giver | Apollo (Speranza) |
| Map | Riven Tides |
| Update | Riven Tides Patch 1.26.0 |
| Objectives | 3 (any order) |
| Single-raid required? | No |
| Items needed in inventory | None |
| Recommended loadout | Free kit / lightweight |
| Estimated time | 10–15 minutes |
| Rewards | Hotel Keycard No. 107 + Smoke Grenade Trap |
| Keycard unlocks | Hotel Panorama Azzurro, Room 107 |
What is the Battening Down Quest in Arc Raiders?
Battening Down is one of the first contracts Apollo hands you on the brand-new Riven Tides coastal map. The story setup is simple: violent hurricanes have torn through the Rust Belt shoreline, cracking the Wavebreaker seawall, ripping up oil infrastructure, and washing strange seaweed onto the beaches. Apollo wants documentation and quick repairs, so he sends you out to photograph the damage, grab a sample, and patch up the most urgent leak.
What makes this quest stand out from earlier Apollo missions like Outstanding Balance is its flexibility. You don’t have to clear all three objectives in a single raid, you don’t have to extract with any collected items, and you can tackle the steps in any order. That makes Battening Down one of the most beginner-friendly quests in the Riven Tides update, and a great way to learn the new map’s geography while earning a useful keycard.
It also acts as a soft tutorial for the Riven Tides points of interest. By the time you finish, you’ll have visited the Wavebreaker, Azzurro Beach, the Hotel Panorama Azzurro, and the northeast pipelines — basically the entire northern strip of the map.
All Battening Down Objective Locations (Quick Map Reference)
Before I break each step down in detail, here’s the at-a-glance overview of where everything lives on the Riven Tides map:
| # | Objective | Map Region | Nearest POI |
|---|---|---|---|
| 1 | Photograph cracks in the seawall | North-central / Northeast | Wavebreaker (struts running N–S) |
| 2 | Sample the shoreline | Northwest | Azzurro Beach (north of Hotel Panorama Azzurro) |
| 3 | Fix the leaking oil pipe | Far Northeast | Dual pipelines past the Wavebreaker’s eastern end |
The seawall photograph and the oil pipe repair sit close to each other in the northeast, while the seaweed sample is on the opposite (northwest) end of the map. Plan your route based on spawn location — I’ll cover that in the routing section below.
Before You Drop In: Loadout & Prep Tips
Battening Down is technically a “combat-free” quest in the sense that you don’t have to fight anyone. But the Riven Tides shoreline is wide open with very little cover, and the new map is crawling with ARC patrols, including the agile Wasps that swoop in from above and the explosive Comets that can ruin your day on a flat beach.
Here’s what I’d recommend bringing:
- Free Kit (Recommended): Since you don’t need to extract with any items, the free starter loadout works perfectly. Saves your good gear for harder Riven Tides quests.
- A Light Sidearm (Optional): If you want some peace of mind, a small weapon like the Anvil pistol gives you a fighting chance against a single ARC unit or a desperate Raider without costing much.
- Adrenaline Shots: You’re going to be sprinting along almost the entire northern coast. Adrenaline lets you cover distance faster between objectives.
- Shield Rechargers + Bandages: Standard insurance. The northern strip is quieter than the central map, but PvP encounters and stray ARC fire still happen.
- Smoke Grenades (if you have them): Great for breaking line of sight on those open beach stretches if a Raider or ARC patrol spots you.
Pro Tip: Don’t sleep on extraction planning. The two closest extracts on the northern coast are the Raider Hatch and the Seaside Elevator, both within a short sprint of the pipeline objective.
How to Complete the Battening Down Quest in Arc Raiders (Step-by-Step)
The three objectives unlock in any order, but the most efficient path is to start at one end of the coast and work your way to the other. I’ll walk through each one in detail below.
1. Photograph the Cracks Forming in the Seawall
The first objective takes you to the Wavebreaker — the long, partially destroyed concrete seawall that runs along the northern coastline of Riven Tides. The Wavebreaker has multiple north–south running concrete struts sticking out into the water, and the photo spot is on one of those struts.
Where exactly to go:
- Head to the northeast section of the map, just east of the Port Authority Building and near the Seabed sub-area.
- Look for the southern end of the far-left strut that you can see sticking out into the water on the in-game map.
- A sunken shipping container half-buried in the sand sits near one of the most reliable photo spots — use it as a visual landmark.
What to do once you’re there:
- Walk up to the cracked concrete until the yellow interact prompt appears.
- Press E (or the corresponding interact button on console) to snap the photograph.
- Confirmation appears on-screen, and the objective ticks off.
Heads-up: Photo objectives in Arc Raiders typically have multiple valid locations along the same structure. If the prompt isn’t appearing on the first strut you try, walk along the southern end of the next one. Don’t waste time circling a single spot.
2. Sample the Shoreline Near the Hotel Beach
This objective is on the opposite end of the map from the seawall photograph, so plan accordingly. Apollo’s wording — “sample the shoreline” — is a little vague, but in practice he just wants you to grab a clump of seaweed.
Where exactly to go:
- Head to the northwest corner of Riven Tides.
- Find Azzurro Beach, which sits directly north of the Hotel Panorama Azzurro point of interest.
- The exact spot is southwest of the Seabed sub-area, right where the sand meets the water.
- Look for the area with a small pier, sunloungers, and torn parasols — then push north a little to the actual shoreline.
What to do once you’re there:
- Look for piles of dark green seaweed washed up on the sand. There are several clusters along this stretch.
- Approach the nearest pile until you see the yellow scan prompt.
- Press E to sample the seaweed. Done.
Note: One thing the other guides don’t mention clearly — the seaweed sample zone can look surprisingly dry. If you’re standing on what looks like just sand with no water in sight, don’t second-guess yourself. The interact prompt is the only thing that matters.
3. Fix the Leaking Oil Pipe in the Northeast (The Hard One)
This is the objective that trips everyone up — myself included. Apollo tells you to fix a “leaking” oil pipe, but here’s the kicker: the section of pipe that registers the repair isn’t visibly leaking at all. It looks identical to every other meter of the pipeline.
Where exactly to go:
- Head to the far northeast corner of the Riven Tides map, past the eastern end of the Wavebreaker.
- You’re looking for two large, partially buried pipelines emerging from the ocean and running south toward land.
- The correct pipeline is the rightmost (eastern) intact one — it’s the only fully intact pipe in the area, which is the easiest way to identify it.
What to do once you’re there:
- Approach the pipeline from the southern end, where it nearly meets the seawall.
- Walk alongside the leftmost (western) pipe of that pair, heading north.
- Keep your eyes on the lower-left of your screen for the yellow interact prompt — there’s no rainbow oil shimmer, no fire, no obvious damage at the actual repair spot.
- Once the prompt appears, press E to weld the pipe shut.
Why this is so confusing: Most “fix the leak” objectives in extraction shooters give you a visible visual cue — sparks, smoke, a colorful oil sheen. Here, the spot you actually interact with is just plain pipe. Just trust the path: rightmost pipeline, follow the leftmost of its two segments north from the seawall, and the prompt will appear.
Alternative landmark: Some players have reported a faint, multicolored oil-spill effect on the water’s surface near the base of the pipe. If you see that, you’re in the right area — but the actual interact spot can be a few meters further along the pipe.
Best Battening Down Route Order (Based on Your Spawn)
The objectives form a rough line along the northern coast: Azzurro Beach (west) → Wavebreaker seawall (center) → Oil pipe (far east). The mistake most people make is starting with the seawall photograph because it’s listed first in the quest log — that puts you in the middle and forces you to backtrack.
Here’s the optimal order based on where you land:
Eastern Spawn (Spawning Near Port Authority / Northeast)
- Fix the oil pipe (far northeast — closest to spawn)
- Photograph the seawall cracks (Wavebreaker, on your way back west)
- Sample the shoreline (Azzurro Beach, far west — final stop near the Raider Hatch extract)
Western Spawn (Spawning Near Hotel Panorama Azzurro)
- Sample the shoreline (Azzurro Beach — closest to spawn)
- Photograph the seawall cracks (Wavebreaker, head east along the coast)
- Fix the oil pipe (far northeast — final stop near the Seaside Elevator extract)
Central Spawn (Anywhere Else)
Pick the closer end (east or west) and follow that route. Never start with the seawall — you’ll always end up doubling back.
Battening Down Quest Rewards
Once all three objectives are checked off, extract from Riven Tides at any safe extract point and head back to Speranza. Talk to Apollo to officially close the contract. The rewards only deposit into your inventory after this conversation — finishing the field objectives alone won’t trigger the payout.
Here’s what you get:
| Reward | Quantity | Type | Why It Matters |
|---|---|---|---|
| Riven Tides Hotel Keycard No. 107 | 1 | Common Key | Unlocks Room 107 in Hotel Panorama Azzurro |
| Smoke Grenade Trap | 3x | Utility / Trap | Tactical area-denial item for future raids |
| Skill Points | Variable | Progression | Tied to the new Riven Tides progression system |
The Hotel Keycard No. 107 is the standout reward here. The Smoke Grenade Traps are nice-to-have utilities for confusing patrols or setting ambushes, but the keycard opens a real loot room — and that’s where the real value is.
How to Use the Riven Tides Hotel Keycard No. 107
Don’t sleep on this keycard. Most players grab the rewards, stash the card in their bunker, and forget about it. That’s a mistake. Here’s exactly how to cash it in:
Where to use it:
- The keycard unlocks Room 107 at the Hotel Panorama Azzurro on the Riven Tides map.
- Room 107 is on the first floor of the hotel complex, located on the right side of the building, slightly to the right of Room 205 (which is directly above on the second floor).
How to get inside:
- Drop into Riven Tides with the keycard in your inventory (this is non-negotiable — no card, no entry).
- Make your way to the Hotel Panorama Azzurro in the northwest.
- Approach the building from the eastern side — the main entrance.
- Once inside, head to the first floor and locate Room 107 on the right side of the complex.
- Use the keycard at the door to unlock it.
What’s inside Room 107:
- Multiple lootable containers (drawers, lockers, crates).
- A gun cache containing weapons — players have reported finding the Bobcat (an SMG-class weapon) inside the cache.
- Random loose loot scattered around the room (medical, ammo, components).
Pro Tip: Combine your keycard run with other Riven Tides Hotel objectives. The hotel has multiple keycard rooms (108, 113, 208, 311, 404), so if you’ve stockpiled a few cards from other quests, you can do a single hotel sweep and clear several rooms in one raid.
Pro Tips for Running Battening Down Efficiently
After running this quest a few times to test routing, here are the optimization tips that genuinely save time and gear:
- Use the Free Kit. I cannot emphasize this enough. You don’t need to extract with anything, and dying with expensive gear on a “documentation” quest feels terrible. Save the good loadout for actual combat quests.
- Don’t aggro ARC unless forced to. The northern coast is patrolled by Wasps, Comets, and the occasional Hornet. They have decent line-of-sight along the open beach. Crouch-walk through tall grass when you can, and use the seawall, pipelines, and shipwreck debris as cover.
- Pop Adrenaline Shots between objectives. The map is huge, and the three objectives are spread across the entire northern coast. A single Adrenaline Shot from the seawall to Azzurro Beach saves you a noticeable chunk of time.
- Stack with other Riven Tides quests. If you’re also running Shoring Up Defenses, Line in the Sand, A Rising Tide, or any other Apollo or coastline quest, you can almost certainly chain Battening Down objectives into the same raid loop.
- Use the Wavebreaker as cover. When sprinting east toward the oil pipe, hug the inland side of the seawall. It blocks line of sight from sniper-perched Raiders on Mulatierra Hill.
- Chunk the quest across two raids if you’re nervous. Since there’s no single-raid requirement, you can do the easy west-side sample on one raid, then come back for the seawall + pipe on a second run with better gear.
- Mark the extraction before you start. Knowing exactly where the Raider Hatch or Seaside Elevator is before you commit to your route means you can punch out the moment trouble shows up.
Common Mistakes to Avoid
These are the slip-ups I made (or saw other players make in chat) that cost the most time:
| Mistake | Why It Hurts | Fix |
|---|---|---|
| Starting with the seawall photograph | Puts you in the middle of the route and forces a backtrack | Always start at the east or west end |
| Looking for a visibly leaking pipe | The repair spot has no visual leak | Trust the path, watch for the prompt |
| Skipping the talk with Apollo | Rewards don’t auto-deposit | Always return to Speranza and chat |
| Bringing high-tier gear | Risk of losing it for a free reward | Use the starter kit |
| Ignoring ARC patrols | Open shoreline = easy target | Use cover, smoke, and crouch movement |
| Trying to single-raid it under stress | The quest doesn’t require it | Split across two raids if needed |
| Forgetting the keycard before returning | Have to re-do another quest run | Stash it carefully in your bunker until ready |
Riven Tides Map Survival Tips (Bonus)
Since Battening Down is your introduction to the Riven Tides map, here are some general survival pointers that will carry over to every other coastal quest:
- Mulatierra Hill is overlooked but dangerous. Snipers love this spot. If you’re sprinting along the open coast, scan the ridgeline before committing.
- The Wavebreaker has hidden routes. Several gaps in the wall let you pass through to the inland side without doubling back.
- ARC weapon crates spawn along patrol routes. If you’re feeling brave, the patrol path between Wavebreaker and Azzurro Beach occasionally drops upgraded loadouts. Worth a side trip if you’re already kitted.
- Patrol cars hold loot. Two locked patrol cars exist on Riven Tides — one near Mulatierra Hill, another near Morano Road. Both contain decent rewards if you have the right keys.
- Storms affect visibility. When the weather turns rough, sightlines drop dramatically — great for sneaking, dangerous for not seeing patrols closing on you.
FAQ — Arc Raiders Battening Down Quest
What is the Battening Down quest in Arc Raiders?
Battening Down is a side quest given by trader Apollo at Speranza in the Riven Tides update. It tasks you with three coastal objectives on the new Riven Tides map: photograph cracks in the Wavebreaker seawall, sample seaweed at Azzurro Beach, and fix a leaking oil pipe in the northeast.
Where is the Battening Down oil pipe location in Arc Raiders?
The oil pipe is in the far northeast corner of the Riven Tides map, past the eastern end of the Wavebreaker. Look for two partially buried pipelines emerging from the ocean. Walk along the leftmost pipe of the rightmost intact pair, heading north from the seawall, until the yellow interact prompt appears.
Where do I sample the shoreline in Battening Down?
Head to Azzurro Beach in the northwest, just north of the Hotel Panorama Azzurro point of interest. Look for piles of dark green seaweed washed up on the sand, then interact with one to scan it.
Where do I take the seawall photograph?
Head to the Wavebreaker seawall in the northeast section of Riven Tides. Photo the southern end of any of the north-south concrete struts — the far-left strut near a half-buried shipping container is a confirmed working spot.
Do I need to complete Battening Down in a single raid?
No. Unlike the Outstanding Balance quest, Battening Down has no single-raid requirement. You can complete the three objectives across multiple expeditions and still claim the rewards.
What are the rewards for Battening Down in Arc Raiders?
Completing Battening Down and returning to Apollo at Speranza rewards you with the Riven Tides Hotel Keycard No. 107 and 3x Smoke Grenade Traps. You may also receive skill points under the new progression system.
What does the Riven Tides Hotel Keycard No. 107 unlock?
The keycard unlocks Room 107 on the first floor of the Hotel Panorama Azzurro on Riven Tides. The room contains multiple lootable containers and a gun cache with a chance to spawn weapons like the Bobcat.
Why can’t I find the leaking oil pipe?
Because the repair spot isn’t visibly leaking. The pipe section that registers the prompt looks identical to every other meter of the pipeline. Walk along the leftmost pipe of the eastern-most pair, heading north from the seawall, and trust the prompt to appear — it’s not a visual cue.
Should I bring my best gear for Battening Down?
No. Use the free starter loadout. You don’t need to extract with any items, and the entire quest can be completed without firing a shot. Save your premium gear for combat-heavy quests.
Can I do Battening Down with a team?
Yes. Battening Down works fine for solo or squad play. Each squad member needs to interact with the objectives individually for them to count, so coordinate at each spot.
When was Battening Down added to Arc Raiders?
Battening Down launched on April 28, 2026, as part of the Arc Raiders Riven Tides update (Patch 1.26.0).
Is Battening Down required for other quests?
It’s not strictly required, but completing it is the only way to unlock Hotel Keycard No. 107 — which gates a loot room on the Hotel Panorama Azzurro. If you’re chasing the new map’s progression, knock this one out early.
Final Thoughts: Why Battening Down Is Worth Doing First
If you’re just starting the Riven Tides update, Battening Down should be at the top of your to-do list. It’s a low-risk, low-effort introduction to the new coastline that pays out a useful keycard for one of the map’s loot rooms. The only real friction is the hidden oil pipe — and now that you know exactly where to walk, that won’t slow you down either.
Beyond the rewards, this quest doubles as a mental map of the Riven Tides points of interest. By the time you finish, you’ll know the Wavebreaker, Azzurro Beach, the Hotel Panorama Azzurro, and the northeast pipeline area — all of which appear in follow-up quests like Shoring Up Defenses, A Rising Tide, and Line in the Sand.
Bookmark this guide and check back for updates — Embark Studios usually patches in tweaks and new objectives during the first weeks of any update, and I’ll keep this walkthrough current as the Riven Tides expedition window evolves through September 2026 and beyond.
Good luck out there, Raider. Apollo’s waiting.